Thursday, September 27, 2012

The New Playroom Part Three: Hacked Ikea Expedit Shelving / Toy Storage


 I was looking for a practical yet functional storage solution for the new playroom.  I came across a pin of a room done by I Heart Organizing on Pinterest.  It was perfect!  

So I hopped over to Ikea (which I'm fortunate enough to live 10 min from one) and bought two pieces from their Expedit line. These are the two pieces I bought.  

EXPEDIT Shelving unit IKEA Finished on all sides. Can also be used as a room divider.EXPEDIT Shelving unit IKEA Can be placed vertically or horizontally. Suitable for use both as a shelving unit and as a sideboard.

 I laid them both on their sides which the intention of using the longer, skinnier one for the bench.  

I bought a piece of MDF board from Lowes and had them cut it the length of the shelf.  I bought three inch thick foam at JoAnn Fabric for the cushion.  With the fabric, foam and board in place, I stapled the fabric to the bottom of the board.

I bought the baskets to go in the cubbies at Walmart for $11 each.

Saturday, September 22, 2012

The New Playroom Part Two: Forest Friends Alphabet Canvas

I really wanted to find a way to incorporate the alphabet into some wall art for the playroom.  I wanted it to be large and have a forest/nature theme. I couldn't find what I wanted, so I decided to make my own. With a blank canvas and some acrylic paint, I incorporated two pieces of inspiration and here was the final product:


 INSPIRATION: this print by Isak and this nursery decor set by Carters)
Abc Poster Trees


Friday, September 21, 2012

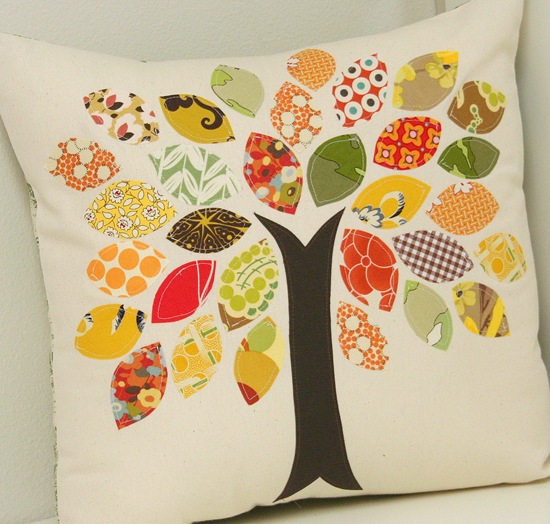
Patch Tree Fall Pillow

I wanted to make some pillows to put on the bench I'm making for the playroom.  Since the playroom's theme is a forest friends / nature theme, I really liked the idea of this pillow.  I found it on Pinterest from Cluck Cluck Sew.  She has step-by-step instructions if you'd like to make one of your own.   
IMG_1189


I made mine a slip cover so that I can change it out if/when I get tired of this one.  I tend to get bored with my decor and change things up every now and then.

Thursday, September 20, 2012

Butterfinger Chunk Cookies

These cookies are delicious!  The melted chocolate and butter from the candy bars give the cookies a toffee-like taste. Recipe courtesy of RecipeGirl.com

Ingredients:

1/2 c unsalted butter
1/2 c granulated sugar
1/2 c (packed) dark brown sugar
1 egg
1 tsp vanilla extract
1 1/4 c, plus 2 tbsp all-purpose flour
1/2 tsp salt
1/2 tsp baking soda
1 1/2 c crushed Butterfingers (about 4 regular-sized bars)

Yield: 24 cookies
Prep Time: 20 min + chill time
Cook Time: 9-11 min


Directions:

1. Using electric mixer, beat butter and both sugars in large bowl until well-blended. 


2. Add egg and vanilla and beat until fluffy. Beat in flour, salt and baking soda.
 

3. Stir in butterfingers (dough will be moist). 


4. Chill cookie dough at least 30 minutes and up to 1 hour.
5. Preheat oven to 350°F.
6.  Line baking sheets with parchment paper.
7. Using a tablespoon of dough for each cookie, drop cookie dough in mounds onto prepared baking sheets, spacing 3 inches apart (about 8 cookies per sheet; cookies will spread). 


8. Bake cookies until golden brown, about 9-11 minutes.
9. Transfer parchment with cookies to rack and cool completely.

 
 Recipe Source: RecipeGirl.com

Wednesday, September 19, 2012

Custom Outdoor Address Sign

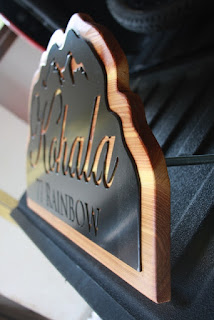
My parents bought a house in the mountains a little while back.  The people that lived there before had a sign with their name and address on it (see below).  So we decided to make our own to replace it. Everyone in the neighborhood has given names to their homes. I grew up in Hawaii so my family has a strong connection and respect for the Hawaiian language so my dad decided to name their place Kohala. The HOA has restrictions as to the size of the signs, so it's not quite as big as I would have liked but it still turned out great!

BEFORE
 
AFTER


Using Adobe Illustrator, I designed the metal (black) portion of the sign.  We have some friends who have a laser metal cutter, so I sent him the artwork file and he cut the design out of a metal sheet.  My hubby then welded two large screws to the back.  We then took that to get powder coated black.  

My husband glued three boards together and I drew out where I wanted him to make the cuts.  He then cut the backboard, rounded the edges and cut two holes for the screws on the metal to go through.  He stained the wood with a clear stain to seal it.   

We used the two posted used for the old sign and painted them black to make the actual sign pop a little more. We gave this to my dad for Christmas last year.  He was pretty excited!


Tuesday, September 18, 2012

Vegetarian Cream of Mushroom Enchiladas

This is an easy and delicious enchilada recipe with a creamy vegetarian twist.  My mom used to make it for us when we were little.  Enjoy!


8 large flour tortillas
3/4 Onion (chopped)
7 oz green chiles (chopped)
4.25 oz black olives (chopped)
2 c shredded cheese (I used a Mexican blend)
2 cans of Cream of Mushroom soup
1 c Sour Cream
2 cans of Worthington FriChik

This recipe serves 6-8


Preheat oven to 350 degrees. 
In one bowl, mix onion, olives, chiles, and cheese.


You can buy the FriChik already diced, but the cans I have were not, so I diced the FriChik.


Mix the FriChik in with the cheese & veggie mixture.


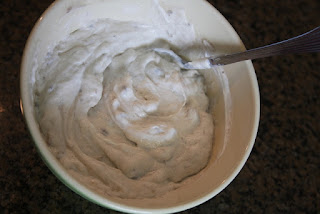
In a separate bowl, mix the sour cream and cream of mushroom soup and set aside.


Grease a 9 x 13 baking pan (I use a glass pan).
Roll veggie mix in tortillas and place in the pan.


Cut them down the middle to make them easier to serve.


Cover with the sour cream and soup mixture.
Bake for 1 hour.


Monday, September 17, 2012

Custom Bathroom Shelf / Towel Rack


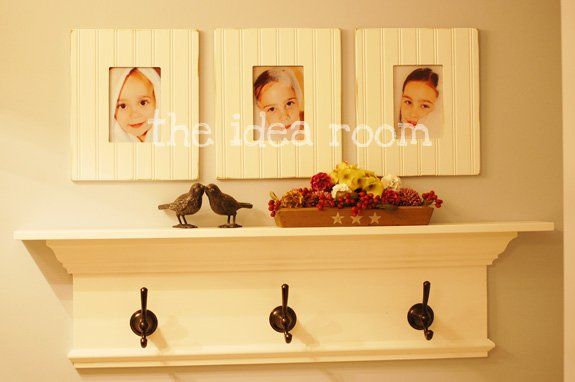
I really wasn't digging the cheap chrome bath towel racks in our master bathroom.  I wanted to change them out with something unique and with character.  I found this project from The Idea Room through Pinterest (of course) and wanted to give it a try. Here is the inspiration behind my project.  Click here for step-by-step instructions. 

Photobucket

The shelf itself only cost about $30, however, I really wanted to incorporate these vintage style faucet knobs. I paid about $50 for the knobs.  So, obviously, that brought the cost up quite a bit, but I really like the final look!


Tuesday, September 11, 2012

Super Cute Shelf Liner

I gave up my search long ago for somewhat cute shelf liner.  Everything I had seen was plain, floral and/or just plain tacky.  Well, I was walking through Marshall's the other day and spotted these. For $6 each I finally have some cute liner. I don't exactly know where I'm going to use them quite yet, but I know that I will definitely find something!  They were just too cute to pass up!